Welltherm · knowledge & inspiration
Mounting a Welltherm infrared panel on the ceiling: steps and tips
20 January 2026 · Welltherm Netherlands / HeatXL
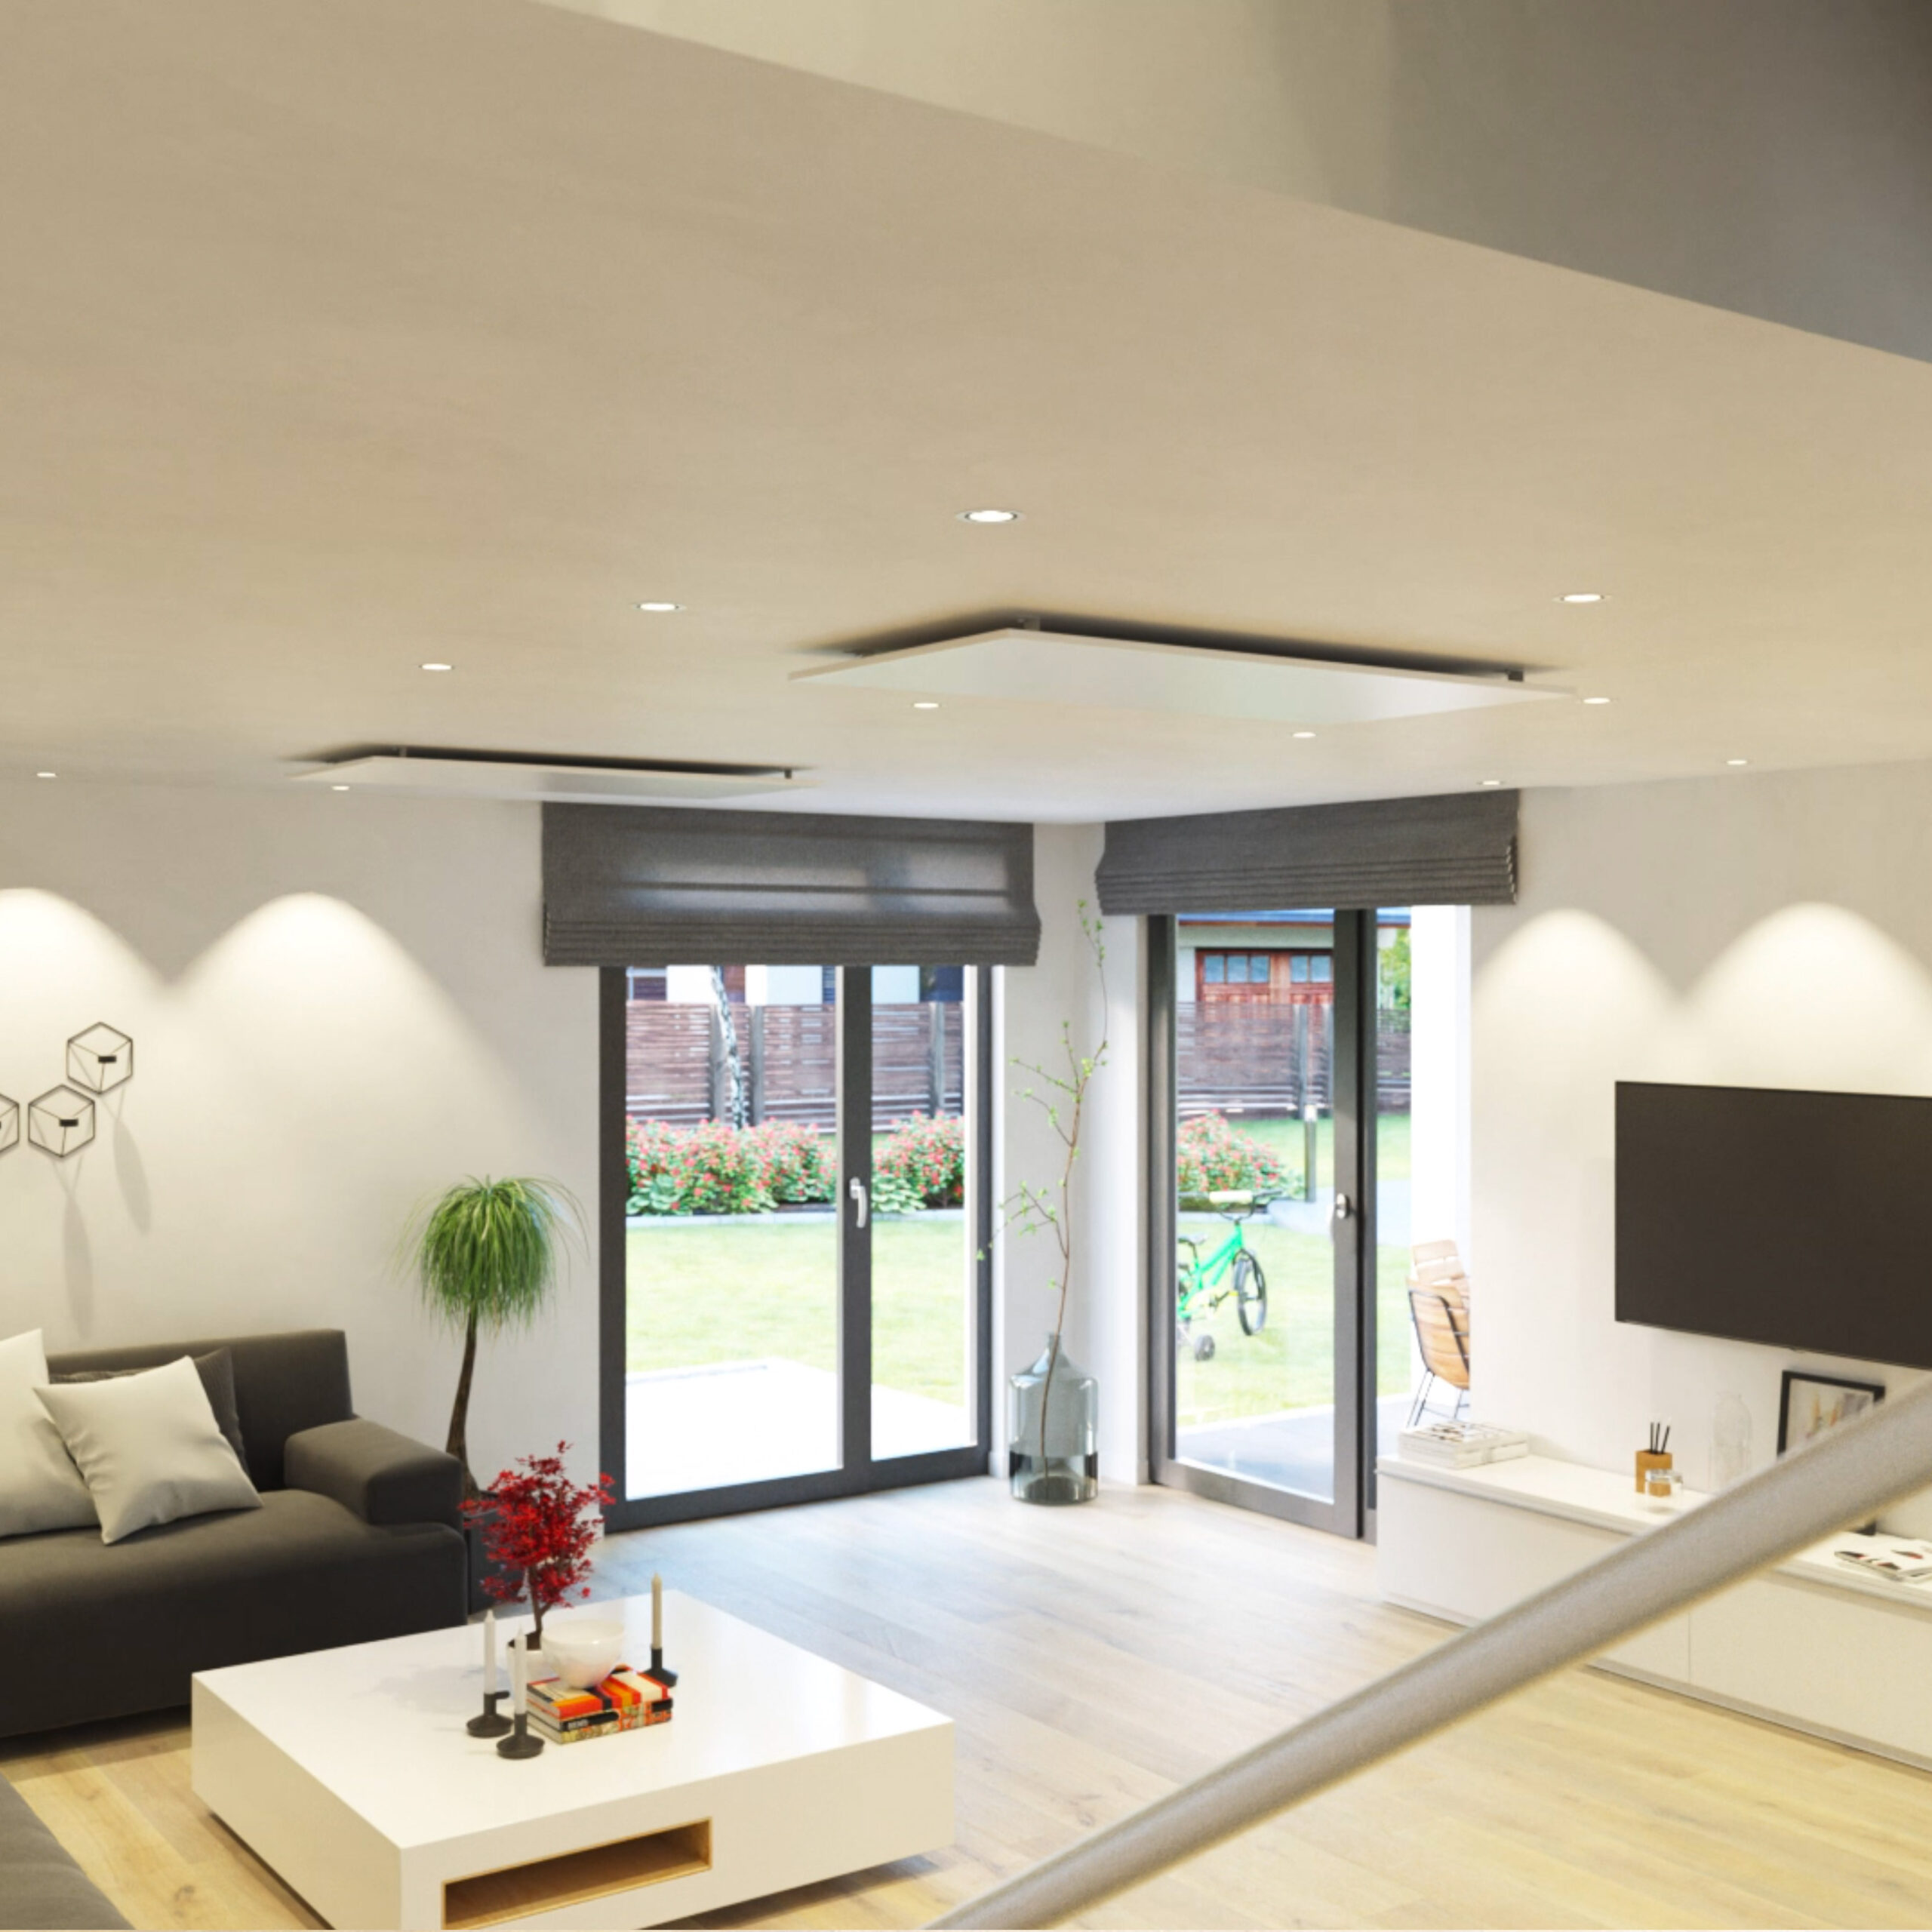
Mounting a Welltherm infrared panel on the ceiling can be an attractive way to integrate warmth into your interior. You leave walls available and select a position matching where you sit or work. A good result starts with the right panel, a suitable ceiling structure and the corresponding mounting components.
Ceiling mounting involves more than attaching a bracket. Dimensions and weight, required clearances, connections and temperature controls belong to the same preparation. This guide helps you make decisions in the correct sequence. It provides a practical plan for organising mounting, considering differences between metal, glass and recess solutions. The manual for your version remains the guiding reference.
Key points to consider
- Check that the selected Welltherm model and specific version are suitable for ceiling mounting.
- Have load-bearing capacity and fixings assessed using the actual panel weight and ceiling structure.
- Use the prescribed mounting system and any additional securing arrangements or glass retainers.
- Plan the power supply, control components and cable route before placing the panel in its final position.
- Align positioning with the occupied area and maintain all clearances from the product manual.
When should you choose an infrared panel on the ceiling?
In a living room, kitchen or study, you often want wall space for furniture, windows and decorations. A ceiling panel can then provide a discreet heating position. Ceiling mounting can also be practical above a work area. Selection depends on the furnishings and chosen product: not every room needs the same position, and not every panel is intended for this mounting method.
With infrared heating, people and surfaces within the radiant area absorb warmth. Heated surfaces subsequently release heat to the air too. The direction, distance and surroundings of the heat source contribute to perceived comfort. Ceiling mounting can create an unobstructed direction towards the occupied area, provided the layout permits it. Tall cupboards, partitions and other structures can affect distribution here too.
An unobstructed radiant direction towards the occupied area
Begin with where you want warmth. In a living room, these might be the sofa and dining table; in an office, the workstations. The ceiling’s centre is not automatically the best starting point. One or several panels can provide a different distribution depending on heat loss and furnishings. A floor plan showing furniture gives more insight than room area alone.
Ceiling mounting also does not replace appropriate output selection. A panel may hang neatly yet contribute insufficiently when heating requirements exceed expectations. Conversely, unfavourable positioning can make warmth feel less pleasant. Coordinate required output and positioning together. Read more about how infrared heating works and the difference between primary and supplementary heating.
Read more
Mounting height influences how warmth is experienced in the occupied position. A suitable panel on a normal domestic ceiling has a different application from a more powerful version in a tall commercial space. There is therefore no universally ideal height for all Welltherm products. Check the model’s possibilities and have distribution assessed when the ceiling is high or the room has different occupied areas.
Keeping wall space available and the interior discreet
The practical benefit of a ceiling solution is that walls remain available. This may be useful in a smaller room with many doors or windows. A white version can coordinate visually with a light ceiling. In another setting, a suitable colour or integrated finish may work better. Also consider lighting and other features: a considered distribution keeps the ceiling clear and organised.
To combine heating and light, investigate a suitable combination with a Welltherm LED frame. Such a frame is a separate accessory and must fit the panel version. It is not a universal option for every size. Also consider operation of lighting and heating; these are different functions that both deserve attention during preparation.
Available solutions differ by product range. The Welltherm infrared panel overview lets you compare materials and applications. First select technically suitable models, then determine their finish. This prevents choosing an attractive version whose required mounting components or clearances do not suit your ceiling.
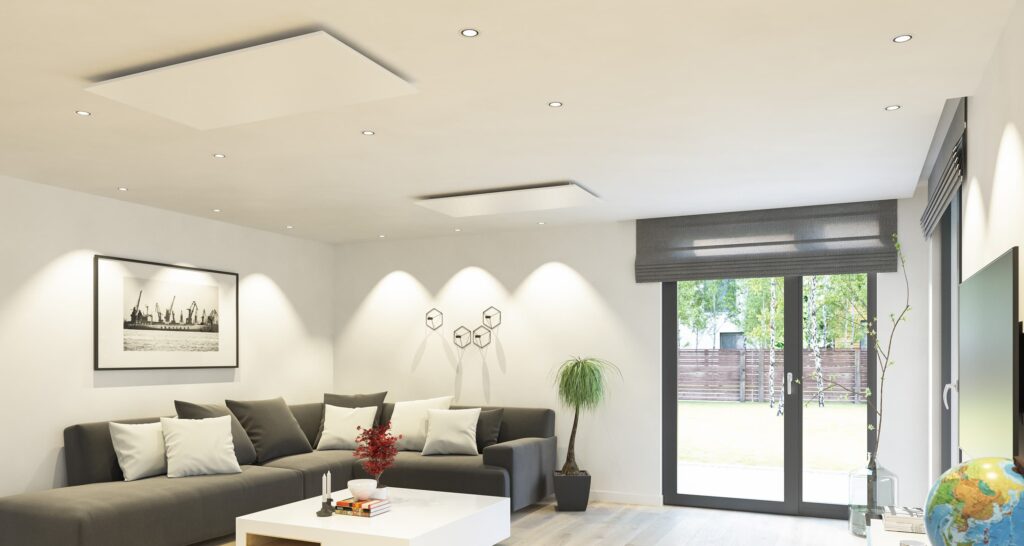
Preparation for mounting a Welltherm infrared panel on the ceiling
Good preparation brings the product and building situation together. Record the product code, panel dimensions, weight and mounting instructions. Check space above and around the planned position. Include control components too. You want to know beforehand where the power supply and any receiver will go rather than considering them only once the panel is fixed.
Use documentation for the exact version. A manual for another material or older product generation may prescribe different components. If information is missing, provide HeatXL with the product code. We help you find the correct product documentation. The downloads page contains manuals and technical documents, including information about glass and recess solutions.
Assessing position, height and clearances
Mark on your floor plan where people usually spend time and which parts of the room are less used. Then consider the ceiling positions possible for those areas. Account for light fittings, curtains, cupboards and doors that may be open. Desired heat distribution must align with the manual’s clearances. These distances can differ by model and mounting system.
Read more
Consider future changes to the ceiling arrangement too. A tall cupboard later placed beneath the panel may affect the layout. In a study, the desk position may still change. Planning the room as a whole helps make a choice that suits usage for longer. Discuss alternative positions when uncertain before establishing the final mounting location.
A bathroom adds conditions concerning water and the electrical installation. The panel’s protection rating is one part of the assessment; permitted positioning must also suit the room. Have a competent installer determine the appropriate combination and location. A ceiling position does not automatically make every version suitable for every bathroom zone.
Preparing load-bearing capacity and the power supply
A finish layer is not the same as the load-bearing structure. With plasterboard, a lowered ceiling or a suspended ceiling, it must be clear how the load is transferred. Select fixings according to the substrate and actual panel weight. Do not adopt a general weight margin or standard wall plug without assessing the arrangement. If uncertain, assessment by a competent installer is the right next step.
Read more
Additional glass retainers may be mandatory for glass panels. Our manual for the glass panels specified in it requires these retainers for ceiling mounting. Therefore, consider not only the rear bracket but also the fixing of the glass itself. Use the retainers and securing arrangement belonging to your product code. This is a product-specific mounting component, not optional decorative finishing.
Have electrical preparation carried out appropriately. Connections, protection, circuit loading and other equipment must be assessed together. Use a competent installer for a fixed connection or alterations to the installation. Also coordinate where the compatible receiver or control component can be placed, preserving its requirements. A neat cable route begins with this preparation.
Which Welltherm mounting solutions are available?
The mounting solution relates to the panel, finish and ceiling structure. A surface-mounted panel remains visible below the ceiling. A recess solution requires a suitable frame and appropriate building conditions. Separate mounting possibilities may exist for certain ceilings or commercial premises. Check permitted use and the components required when ordering each product.
A panel’s shape does not provide enough information about its fixings. Two versions with approximately the same dimensions can differ in weight, rear construction and required accessories. Therefore, use a combination intended for the model. Treating the panel and mounting system as one selection helps clarify which components are standard and which must be added.
Surface mounting with suitable brackets
For surface mounting, the panel hangs below the ceiling finish using its corresponding fixing system. The prescribed components provide positioning, support and any securing arrangement. Follow the manual’s mounting sequence. Do not improvise a structure reducing the necessary space behind the panel. The objective is an installation allowing the appliance to emit heat in its permitted manner.
Metal Welltherm panels offer different sizes that can be selected for suitable ceiling applications. Glass versions have their own conditions, including any glass retainers. Discuss the desired material and existing ceiling structure. Our page about metal infrared panels shows models; mounting requirements come from the documentation for the selected version.
Recess frames and special ceiling structures
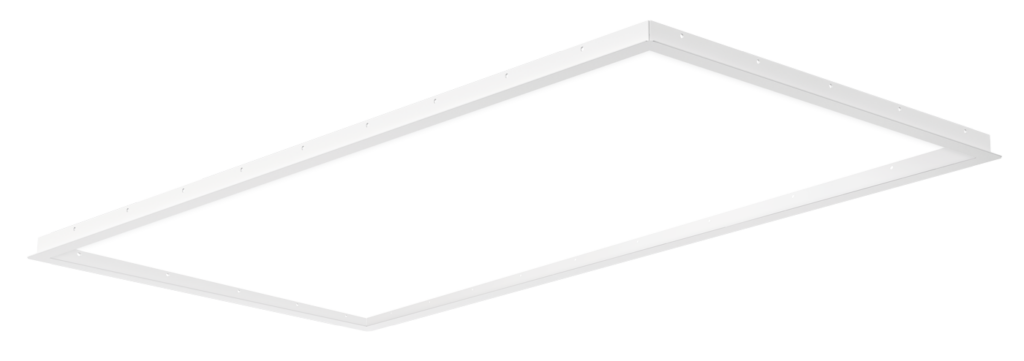
A Welltherm ceiling recess frame can form part of a suitable integrated solution. The frame must fit the panel and ceiling. Required space, fixings and permitted construction belong to the specific combination. A recess frame therefore does not indicate that a panel can be placed in every opening without further assessment.
For taller commercial premises, we discuss separately how warmth should reach the occupied area. Other models and fixing possibilities may be relevant. Do not automatically use a standard domestic solution as an example for a tall hall. View the possibilities for workstations and business premises and provide ceiling height and usage objectives for focused product selection.
Read more
With suspended ceilings, the structure must support the installation and the version must suit the application. Simply removing a ceiling tile and laying down a panel of approximately the same size is not a complete mounting approach. Have the supporting structure, support and any additional fixings assessed. Access to cables and control components also matters if later inspection or replacement is needed.
Step-by-step plan: from product selection to checked mounting
The following plan helps organise your project. It gives the sequence of preparations and checks, while the exact procedure follows the product manual. This helps coordinate with the fitter or installer and clarifies the information required. Mounting a Welltherm infrared panel on the ceiling requires care with both fixings and connections.
- Choose a suitable model. Determine primary or supplementary heating, output, material and permitted ceiling mounting.
- Gather the correct documentation. Check the product code, supplied components and required accessories.
- Assess the substrate. Have load-bearing capacity and fixings coordinated with panel weight and the structure.
- Plan the mounting position. Include the occupied area, clearances, lighting and other objects.
- Prepare connections and controls. Have required electrical work performed and select suitable control components.
- Mount according to the manual. Use prescribed brackets, retainers and securing arrangements.
- Check the installation. Verify fixings, cable route, accessibility and clearances before commissioning.
- Adjust the controls. Check operation and adapt the programme to the room’s usage.
Prepare a components list when organising the order. Include the panel model, mounting system, any glass retainers or recess frame, thermostat and corresponding receiver. Record which components come with the panel and which are required separately. Have this list checked before work begins. This helps organise mounting and operation as a complete arrangement.
It is also practical to document access arrangements. A receiver or connection point may need checking or replacing later. Discuss how the panel or finish becomes accessible again in accordance with instructions. Keep the product manual and details with the home or project documentation. A subsequent installer can then easily establish which version and components were used, even if furnishings change after several years.
Concrete, timber and plasterboard require suitable fixings
With a solid substrate, drilled holes and fixings must suit the material and load. This also requires checking pipe positions and the existing structure. With timber sections, the locations of load-bearing elements and whether mounting into them is permitted matter. The ceiling finish alone does not determine which fixings are suitable.
Read more
With plasterboard, the structure behind it is particularly relevant. Board thickness, support and prescribed use of fixing materials must be included. A product description such as hollow-wall plug provides no complete guarantee for a ceiling load. Have the whole solution assessed, especially for heavier or glass panels. This makes the fixing selection specific rather than relying on a general internet rule.
Also organise safe panel handling during mounting. Size and weight determine how the appliance can be brought into position. A second person or suitable support may be needed depending on the version and method. Avoid having to support the panel overhead while simultaneously completing fixings without an appropriate mounting approach.
Finishing cables and control components neatly
A discreet finish results from planning the cable route beforehand. Discuss with the installer where the connection will go and how the cable can be routed permissibly. Keep cables clear of places where they may be pinched or adversely affected by heat. A receiver must also occupy a suitable location and remain accessible according to its own mounting requirements.
With suitable Welltherm panels, the precon plug system helps combine the panel and compatible components. Check the version before ordering accessories. A suitable thermostat and receiver together with the panel form the controls. A connector alone does not determine every heating system function or replace assessment of the electrical installation.
After commissioning, check that the controls operate as intended. Temperature measurement belongs in a representative room position, not directly where the heat source distorts the reading. Then configure hours of use and desired temperature appropriately. Read our information about thermostats and controls to compare different operating possibilities.
Avoiding common ceiling mounting mistakes
The main mistakes often arise from selecting components separately. A panel fits dimensionally, but its fixings have not been assessed. Or mounting looks neat while the receiver occupies an unsuitable position. Therefore, make an overview of the complete combination and check it before mounting. Sharing ceiling photographs and the product code helps resolve questions.
Maintaining clearances and product-specific securing arrangements
Maintain the manual’s distances and do not alter the mounting system to bring the panel closer to the ceiling. The fixing structure belongs to the permitted application. Do not cover the rear with improvised finishes that change the conditions. For glass models, prescribed glass retainers must also be checked; the rear bracket is not the only consideration.
Read more
Also check whether the chosen ceiling finish suits the installation. Fragile materials or unusual structures require discussion beforehand. Avoid assuming every paint, timber type or board can withstand the same conditions. Correct assessment connects product requirements with the actual building situation. This clarifies which version and mounting method are eligible for your project.
Assessing positioning and temperature controls together
A neatly mounted panel needs suitable controls to match your usage. Consider time programmes, sensor positioning and operation per room. With several panels, it must be clear which appliances are controlled together. Lighting in any LED combination additionally requires appropriate separate operation.
Do not expect a fixed savings percentage solely from ceiling mounting. Energy consumption follows from output, actual switched-on time, building conditions and settings. Suitable positioning can help achieve desired comfort, but does not automatically reduce the home’s heat loss. Therefore, compare the complete plan, including controls and expected duration of use, before assessing mounting as an isolated measure.
A considered ceiling plan for your Welltherm panels
With the right preparation, you can incorporate ceiling heating discreetly into your interior. The best choice begins with heating requirements and the occupied area, followed by a suitable model and checked fixings. HeatXL helps with product selection and documentation in the Benelux. For mounting and connection work, coordinate with an appropriate competent contractor.
Would you like to mount a Welltherm infrared panel on the ceiling and compare the possibilities first? Send a floor plan, ceiling height, photographs and structural information. Also state which rooms you want to heat and when you use them. Request a proposal for your ceiling heating so that the panel, mounting components and controls can be coordinated together.
Frequently asked questions about Welltherm panels on the ceiling
Can every Welltherm infrared panel be mounted on the ceiling?
No, check permitted mounting for the specific range and version. Dimensions, weight and accessories can differ. Select the product and fixings together and consult the manual for the product code. Additional glass retainers are mandatory for some glass models.
How much space must remain behind the panel?
Use the distances prescribed by the product manual and mounting system. No single dimension applies to all panels and recess combinations. Do not alter brackets or spacers to reduce the space, and also check clearances around the appliance.
Can a panel be mounted above a bed?
Assess the model, permitted height and warmth experienced where someone lies. The position directly above the headboard is not automatically the most pleasant. Include the bed, duration of use and temperature controls in the plan, and follow the selected appliance’s mounting requirements.
Can I make a fixed ceiling connection myself?
Have a competent installer perform a fixed connection or alterations to the electrical installation. This involves more than the cable joint: protection, load and suitable finishing also matter. Provide panel details and control components during preparation.
Can heating damage the ceiling?
Product requirements and ceiling material must be compatible. Maintain prescribed distances and use correct fixings. Have special or fragile finishes assessed beforehand. A general promise that every material remains undamaged under all conditions does not replace this check.
How do I establish the weight for the fixings?
Use the exact panel model’s weight and include required accessories. Values appear in the specifications. The installer then assesses how the structure and fixings support that load. An average weight for infrared panels provides insufficient information.
Do I need an additional electrical circuit?
This depends on the complete installation and other equipment connected to the relevant circuits. Have the electrical situation assessed, particularly with several panels or a larger all-electric installation. The outcome may require different distribution or additional provisions.
What is the best mounting height?
Suitable height depends on the model, occupied area and room. Consult the version’s minimum requirements and include comfort at the intended position in the plan. Tall commercial premises may need different solutions from an ordinary living room.