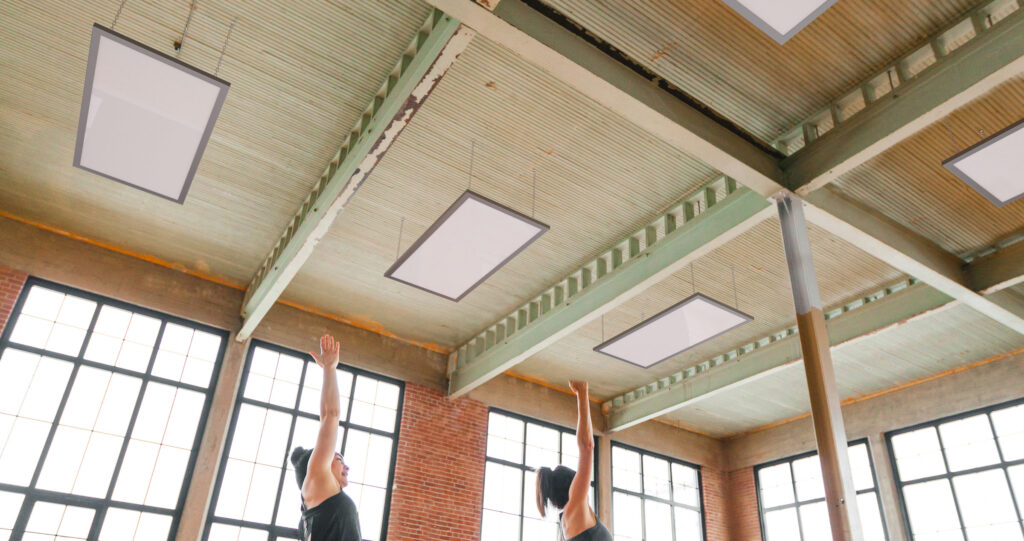
Welltherm application example. Also view the technical product images.
WELLTHERM · TARGETED & PROJECT HEATING
Welltherm high-temperature infrared heating
Explore the available Welltherm range, prices and ordering options. Opens in a new tab.
For larger rooms and applications that require a different heat output. Discover the current Welltherm HT1401 and have the installation tailored to your project.
We match the panel, connection and controls together. View the connection and controls or discuss your existing installation when making an enquiry.
- For project-specific heating
- HT1401: 1400 watts
- Assess installation and controls for your project
A tailored proposal for your space, finish and installation.
A system for a particular space
For showrooms, industrial halls and hot yoga studios, we offer high-temperature heating with a different heat output from standard domestic panels. We tailor the system to the ceiling height, occupied areas and desired temperature. You receive a considered product recommendation and a proposal for your project.
Compare output and finish
HT1401 is a 1400-watt satin glass panel with an anthracite grey frame. It measures 63.5 × 123.5 × 2.6 cm, weighs 19.1 kg and is intended for ceiling mounting. Do you have an older model? Provide its article number for support or expansion.
Current range
Welltherm High Temperature HT1401
For suitable high-ceilinged spaces and hot yoga studios. We tailor the output and positioning to your project.
| Article | Version | Power output | Dimensions | Weight | Quotation |
|---|---|---|---|---|---|
| HT1401 | High-temperature heating | 1400 W | 63,5 × 123,5 × 2,6 cm | 19,1 kg | Choose HT1401 |
- Protection rating
- IP20
- Technology
- ESHC Plus
- Front
- 5 mm ESG-H safety glass
- Frame
- Anthracite grey RAL 7016
Connection and application: 650 mm cable with open ends; suitable controls required.
Prepare the suspension of HT1401
HT1401 is intended exclusively for ceiling mounting in a suitable dry indoor space. The mounting drawing specifies a minimum of 2.5 metres above the floor, 30 centimetres between the panel and ceiling, and 20 centimetres of clearance at the sides. These distances apply to HT1401 and must not be replaced by the mounting requirements for an ordinary domestic panel.
Suspend the panel from at least four fixing points. Chains, wire ropes and additional fixings are selected separately to suit the load-bearing ceiling structure. The connecting cable has open ends; have a qualified professional carry out the connection and control installation. Position the receiver in a zone without thermal loading, never loose on the hot rear surface of the panel.
Welltherm high-temperature infrared heating for your project requirements
Welltherm high-temperature infrared heating is selected for a specific space. The current HT1401 has its own temperature characteristics, mounting requirements and electrical preparation. This makes it a project-specific choice for suitable dry indoor spaces. Describe what the installation needs to do: heat a particular occupied zone, contribute to a studio installation or form part of a complete heating plan. A product name and a high electrical output do not together constitute a design for that task.
For an existing installation, the first question is which model is actually installed. An older high-temperature panel may have different dimensions, connections or mounting instructions. Send the article number and photographs of the situation when requesting support or an extension. Current HT1401 specifications do not automatically apply to older versions. This allows us to distinguish clearly between a new project and changes to an installation that has been in use for some time.
Welltherm manufactures the products and HeatXL handles Benelux distribution. In our project preparation, we combine product data with the conditions in the room. The selection is then documented with quantities, output, mounting and controls. This gives your installer a concrete starting point. Also explore the options for businesses when different rooms or occupied zones within the same building have their own heating requirements.
Read more
In a high-ceilinged room, the position of the heat source can greatly influence the experience at floor level. The distance to users, ceiling layout and distribution of panels belong in the same assessment. We discuss where people spend time and which parts of the space are used at other times. An evenly spaced row on a construction drawing is not automatically the most suitable distribution. The practical layout of the occupied areas gives the heating plan its direction.
Distinguish HT1401 from other ceiling systems
The current HT1401 has an output of 1400 watts and a satin front made from 5-millimetre ESG-H safety glass. Its anthracite grey frame is RAL 7016. Measuring 63.5 by 123.5 by 2.6 centimetres and weighing 19.1 kilograms, the panel requires carefully planned suspension. The table on this page lists this current version. This is the product basis for a new proposal; similar names in older documents do not represent additional current products.
Satino PRO is a separate glass ceiling series. Its WS articles and mounting instructions belong to that range and cannot be interchanged with HT1401. Ceramic ceiling heaters such as HPPW1950 and HPIW1950 also have their own construction and dimensions. Compare these systems according to the room’s function and their permitted applications. A higher or similar electrical output does not establish that the products can use the same mounting height, clearances and controls.
HT1401 has an IP20 protection rating. This version is prepared exclusively for ceiling mounting in a suitable dry indoor space. Include the actual moisture and operating conditions, for example in a studio where humidity changes during classes. Being positioned above the floor does not automatically give an appliance permission for a different environment. Have the product choice and mounting assessed against its own manual and the conditions expected in your building.
Read more
The higher temperature of the panel surface is a product characteristic, not a room temperature setting. The desired operating temperature, heat losses and distribution remain part of the design. A studio also involves a class timetable; a workspace involves occupancy and activities. The proposal should therefore clearly state the room conditions being targeted and the product arrangement being assessed to achieve them. This makes a comparison between possible systems useful in substance.
Check height, clearances and supporting structure
The HT1401 mounting drawing specifies a minimum height of 2.5 metres above the floor. It also requires 30 centimetres of clearance between panel and ceiling and 20 centimetres at the sides. Measure the actual height to the planned panel, not just from the structural floor to the ceiling. A suspended ceiling, suspension assembly or later floor finish can change the available space. Use the actual measurement in the initial assessment of the plan.
HT1401 is suspended from at least four fixing points. Chains, wire ropes and other fixings are selected for the specific structure. A ceiling tile is not, without further assessment, equivalent to the supporting structure above it. Have the installer determine where the load will be carried and which materials are suitable. The panel’s own weight and the suspension arrangement are checked together before the visible ceiling finish is completed.
Read more
A low ceiling cannot be made suitable by shortening the suspension beyond what the model permits. The clearance forms part of the product’s mounting requirements. If the dimensions do not fit, we consider another suitable solution or adjusted positioning. Mark any beams, pipes, lights and ventilation ducts on the drawing. The suspension points and connection, as well as the panel front, must remain practical in the actual ceiling environment.
Accessibility also belongs in the design. A panel that can only be reached after installation using complicated temporary structures requires a considered maintenance plan. Look at access for a suitable working platform and access to connection components. Discuss who will maintain the installation later and which ceiling components remain accessible for that purpose. Operating clearances and access during work are different questions; preferably both are resolved in the same project overview before installation.
Electrical preparation for a project
The current HT1401 has a 650-millimetre connecting cable with open ends. This is not a desk product that plugs into a socket using its own inline dimmer. Have a qualified professional prepare the electrical connection and suitable controls. State how many panels are being considered and where connection points could be located. The installer assesses the available capacity, distribution and components required for the specific installation.
With multiple panels, the combined connected load becomes relevant. Three HT1401 panels, for example, represent 4200 watts when all three are operating at full power. This figure is a load specification for planning, not a prediction of annual consumption. Controls may later switch panels according to temperature, but the electrical installation must be designed for the intended load. Have circuit allocation and switching components assessed independently of a favourable average operating time.
The controls are selected for the project’s purpose. A suitable temperature sensor must usefully represent the intended room or zone; the receiver and controls must suit the load. An app requirement is a separate system choice and does not mean HT1401 has built-in Wi-Fi. Explore the available controls and discuss who may adjust programmes. In a business or studio, a clear allocation of responsibilities helps distinguish daily adjustments from permanent settings.
Read more
An accompanying receiver belongs in a zone without thermal loading and must never be placed on the panel’s hot rear surface. Determine its location early in the design, including the cable route and maintenance access. A vacant position that seems practical during construction may still become unsuitable during operation if a hot appliance or duct is nearby. Have the position assessed in the final ceiling arrangement, rather than solely in the empty construction situation.
Distribution and commissioning at occupied locations
A heating plan starts with the places where people actually spend time. Mark mats, work zones, counters or other fixed occupied locations within the room. Also identify any layout that changes regularly. The distance to panels and distribution of radiant heat influence the experience in different parts of the space. Different conditions may therefore coexist within an open layout. The plan is assessed from these occupied locations and then combined with the possibilities offered by the ceiling.
Read more
Air temperature is one measurement; the radiant heat someone experiences in a particular location is another aspect of comfort. A reading near a wall does not automatically represent every position in the middle of the floor. Select a suitable measurement location and also record how different occupied locations feel during commissioning. This combination offers more insight than repeatedly raising the temperature setting when one position feels different. We first check whether positioning, distribution and controls work together.
Warm-up time belongs in commissioning. Both the panel and its surroundings must respond from their starting temperature. A space that has cooled significantly requires different preparation from one where background heating is already present. Measure using the normal operating schedule and record the initial conditions. A programme can then be adjusted based on real experience. Setting the heating start time purposefully is more useful than expecting one fixed, rapid warm-up time for every building.
Ventilation remains part of the operating plan. Fresh air, extraction and open doors affect heating demand and can change measurements. Include the planned ventilation rate and operating times in the project. An additional heat source does not perform the ventilation function. In a studio or business, both systems should be prepared so the room meets the specified requirements during normal use. Discuss this relationship with the installers and manager involved.
Assess consumption using your own operating hours
For an initial consumption estimate, we multiply electrical output by actual operating time. One 1.4 kW HT1401 operating at full power for two hours uses 2.8 kWh in this hypothetical example. The cost is this number of kilowatt-hours multiplied by your own electricity tariff. This is a calculation example, not a consumption expectation. Actual operating time depends on heat loss, desired temperature, starting conditions and how the controls operate in your room.
After commissioning, suitable measurement allows you to monitor operating time and consumption. Record operating hours and conditions at the same time so differences can be explained. A colder season or longer opening hours affect the result. Assess changes over a representative period. Also consult the consumption guide if you want to put the calculation steps and your own electricity tariff into an overview.
Read more
In a studio, you can consider class preparation and the classes themselves separately. A timetable with a few blocks each day may require a different heating strategy from continuous use. Opening hours and occupancy matter in a workspace. Also describe days off and periods when a zone is unused. The programme can then be built around the actual calendar, rather than solely the appliance’s maximum operating time.
Use the same heating requirements when comparing systems. A system for a local occupied zone cannot be directly compared with a solution intended to maintain the temperature throughout a hall. State which room conditions, operating hours and other heat sources are assumed in both proposals. Ask which data have been calculated and which can only be measured during commissioning. A transparent overview of assumptions makes a cost comparison more useful than a general percentage unrelated to your building.
A project enquiry with clear starting points
Include a floor plan, ceiling height and photographs of possible mounting locations with your enquiry. Specify windows, external walls, insulation and existing heating. Describe which zones are used and when. For a studio, provide the class timetable and desired room conditions; for a business, describe activities and occupancy. We can then discuss product selection for a concrete project. A list containing only the building’s floor area leaves too many important conditions unanswered.
A proposal identifies the chosen version, number of panels, mounting arrangement and control components. Check which fixings are selected separately and which work falls outside product supply. Prices for HT1401 and components are specified on request. Request a project quotation with the relevant details so you can assess the complete combination. Where several parties are involved, one agreed overview helps prevent differing assumptions during installation.
For support in the Benelux, you can also contact HeatXL. Include the Welltherm manual for HT panels in your preparation. Always check the article number and document version for an existing appliance. Current product data, model instructions and your project information together form the basis of a useful proposal.
Read more
State what technical preparation is already in place. Are there connection points near the ceiling, what structure will support the panels and where can controls be positioned? Include any plans from the installer. If you are still renovating the ceiling, specify when finishing and cabling will take place. This allows product selection to fit the construction schedule. The chosen model’s documentation is then considered alongside the actual structure and electrical installation.
Practical questions for installation and management
Can HT1401 also be mounted on a wall? The current version is prepared exclusively for ceiling mounting. A different orientation is not selected simply because a wall position appears easier. Provide the actual ceiling height and structure; if this application is unsuitable, we consider another suitable product option. Fixings, clearances and electrical preparation belong to the selected model. This connects appliance selection to the room before mounting work takes place.
Is a high ceiling enough to select this product? Height is one requirement, but the room’s purpose, dryness, heating demand and structure also matter. A ceiling that is high enough on paper may have fewer usable positions because of ducts or lights. Add these elements to the drawing. Expected use and desired temperature are also included in the assessment. Product selection follows from all these conditions together.
What should be included in handover after installation? Keep the product number, final arrangement and control and connection details. Agree who manages settings and who assesses the system when something changes. A different room layout can affect occupied positions and the measurement location. If the interior changes later, the original project drawing helps identify what needs reassessment. Pass this information on to a new manager of the space as well.
How should maintenance be prepared? Ensure panels and connection components remain accessible to a qualified professional, and follow the appliance’s cleaning and operating instructions. Work takes place with appropriate electrical precautions and a cooled product. Hang nothing over the front and do not use the suspension for additional objects. Keep purchase and installation records alongside the warranty information. An accessible system with clear records makes support during later use more focused.
Documentation for your version
Match the product information and installation instructions to your chosen article number. On the downloads page, we give Dutch documents priority where available.
Questions about high-temperature infrared heating
How does it differ from the high-output glass series?
This page covers HT1401: 1400 watts, with a satin glass front and an anthracite grey frame. Satino PRO is a separate glass ceiling series with WS article numbers and outputs from 500 to 1300 watts. Different mounting instructions apply to the chosen range.
What do you need for a quotation?
Send the desired item or version, together with the room dimensions and your usage. For a panel, we also assess insulation and the mounting position; for an accessory, we check the combination with the existing product.
How much does this Welltherm solution cost?
The price depends on the version, quantity, accessories and any project arrangements. Request a quotation with your product choice and situation to receive a tailored proposal.
Explore these options too
Targeted & project heating
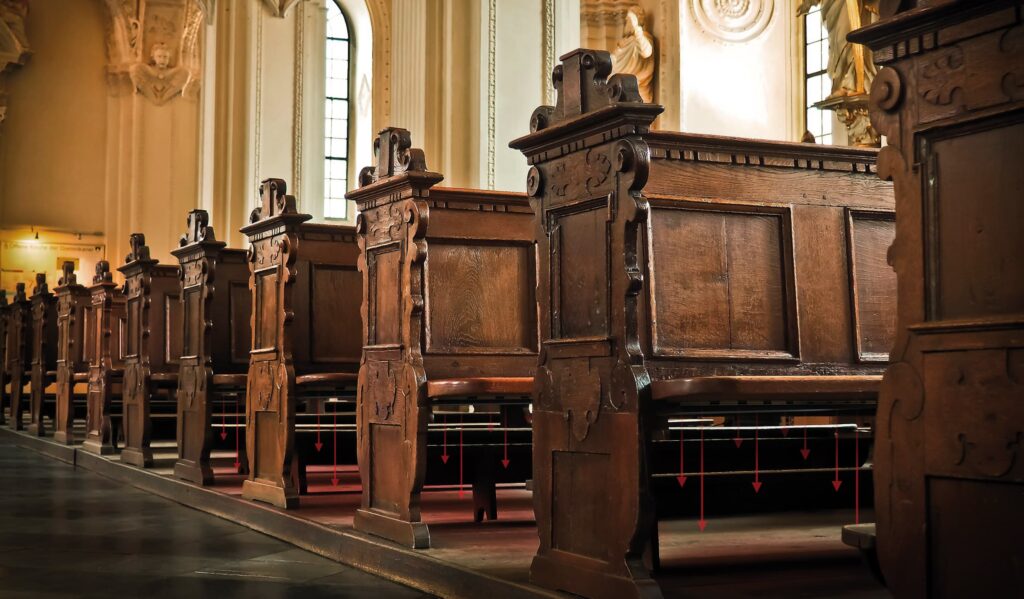
Infrared church pew heating
Bring warmth to seating with Welltherm church pew heating. The CB range is mounted beneath the pew and directs radiant heat towards the foot area.
View finish ↗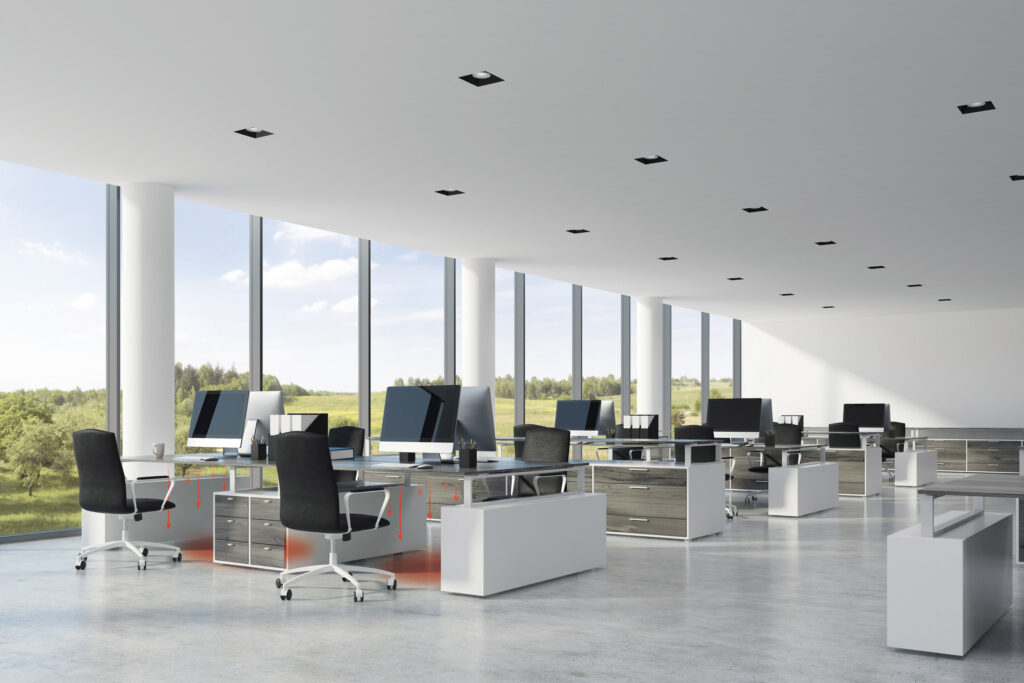
Targeted & project heating
Infrared desk heating
Targeted warmth beneath your desk, without a large panel in view. The Welltherm ST range heats the foot area of an office or home workspace.
View finish ↗From product choice to a tailored proposal
Tell us which space you want to heat. You receive advice on the suitable version, output and mounting, with a quotation for your situation. For your preparation, you can plan heating for a hot yoga studio.